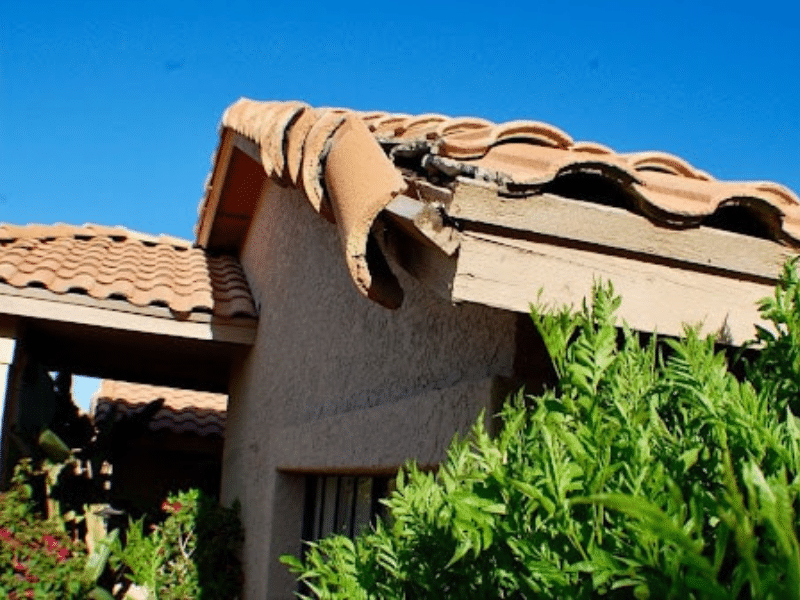
Finding water stains on your ceiling or shingles in your yard after a Phoenix monsoon brings that stomach-dropping moment every homeowner dreads. Roof damage requires quick action, and the cost can seriously strain your budget.
Your homeowner’s insurance might cover a full roof replacement, potentially saving you thousands of dollars. The real hurdle? Navigating the roof replacement insurance claims process correctly to get the coverage you deserve.
At RENCO Roofing, we’ve guided countless Arizona homeowners through successful insurance claims for roof replacements. Whether you’re dealing with monsoon damage, hail impacts, or fallen debris, understanding how to work with your insurance company can make all the difference between a denied claim and a fully funded new roof.
This guide walks you through the essential steps to get your insurance to pay for your roof replacement – from documenting damage correctly to working effectively with adjusters. Let’s dive in and turn that roofing emergency into a manageable process with this step-by-step guide.
Step 1: Determine If Your Roof Damage Is Covered by Insurance
Not all roof damage qualifies for a roof replacement insurance claim, so the first step is figuring out whether your policy will cover the repairs or replacement. This can be one of the most stressful parts of the process, but having a clear understanding of your coverage upfront can save you time and frustration.
Types of Roof Damage Typically Covered
Insurance policies usually cover roof damage caused by sudden and unexpected events. If your roof was in good shape before the incident, there’s a good chance your policy will help with the cost. Common covered events include:
- Storm damage: Heavy rainfall and monsoon storms that cause structural issues
- Hail damage: Impact marks, cracked tiles, or damaged shingles from hailstorms
- Wind damage: Missing shingles, broken tiles, or lifted sections from high winds
- Falling debris: Trees, large branches, or other objects that impact your roof during storms
Insurance companies understand that Arizona homeowners face unique weather challenges. A properly maintained roof, damaged by these external forces, typically qualifies for coverage.
What Insurance Won’t Cover
Unfortunately, insurance companies draw clear lines around what they consider non-covered scenarios:
- Normal wear and tear: Gradual deterioration that happens over years
- Poor maintenance: Damage resulting from neglected maintenance issues
- Pre-existing problems: Issues that existed before you purchased your policy
- Flooding: Most standard policies exclude flood damage (requires separate flood insurance)
How to Check Your Policy for Roof Coverage
Every insurance policy is different, so it’s worth reviewing yours before filing a claim. Look for sections detailing “covered perils” and roof replacement provisions. If anything seems unclear, call your insurance provider and ask specific questions about what’s included.
Once you know whether your damage qualifies for coverage, the next step is to assess the condition of your roof and gather the evidence needed to support your claim.
Step 2: Assess the Damage
Once you’ve confirmed that your insurance might cover your roof damage, the next step is to assess the extent of the problem. A thorough inspection not only helps you understand what you’re dealing with but also ensures you have the right documentation when filing your claim.
How to Inspect Your Roof for Damage
Start with a visual inspection from the ground. Grab a pair of binoculars or use your phone’s zoom feature to check for obvious signs of damage. Look for:
- Missing, curled, or cracked shingles – These can be signs of wind or hail damage.
- Granule loss – If you notice a lot of roofing granules in your gutters or around your home, your shingles may be deteriorating faster than expected.
- Visible dents or cracks – Hail or falling debris can leave noticeable impact marks.
- Sagging or uneven areas – This can indicate structural damage beneath the surface.
Next, check inside your home for water stains, leaks, or discoloration on ceilings and walls. Even if your roof looks fine from the outside, water intrusion could be happening underneath.
If you have safe access to your attic, look for damp insulation, mold growth, or beams that feel soft to the touch—these are red flags that your roof may not be keeping moisture out.
Documenting the Damage Properly
Insurance companies require clear, detailed evidence to process your claim. Taking the time to document the damage properly can make all the difference in getting the coverage you need.
- Take high-quality photos and videos – Capture wide shots of the roof as well as close-ups of any damage. If possible, use timestamps to show when they were taken.
- Keep records of the storm event – If a monsoon, hailstorm, or heavy winds caused the damage, note the date and severity. Screenshots of local weather reports can help support your claim.
- Write a damage report – A simple document listing what you observed, when it happened, and any immediate issues (such as leaks) can be useful when discussing your claim with the insurance company.
If you’re unsure about the extent of the damage or how to document it properly, bringing in a professional is the best move. A licensed roofing contractor can provide an expert assessment and ensure nothing gets overlooked before you move forward with your claim.
Step 3: Contact Your Insurance Provider
Once you’ve assessed the damage and gathered your documentation, it’s time to notify your insurance company. Filing your claim quickly and correctly can help avoid delays or complications in getting your roof replacement approved.
When Should You File a Roof Replacement Insurance Claim?
Timing is key when dealing with roof replacement insurance claims. Most policies have strict deadlines for reporting damage, so it’s important to act fast. In general, you should file a claim if:
- The damage was caused by a covered event, like a monsoon, hailstorm, or falling debris.
- Repairs will cost more than your deductible—if the damage is minor, paying out of pocket might be a better option.
- There are signs of leaks or structural issues that could worsen over time.
If you’re not sure whether filing a claim is the right move, a roofing professional can provide an inspection and help you understand your best options.
How to Properly File a Roof Replacement Insurance Claim
When you’re ready to file, follow these steps to make the process as smooth as possible:
- Call Your Insurance Company – Explain the situation and ask about the next steps for filing your claim. Have your policy number handy.
- Provide Clear Evidence – Submit your photos, videos, and damage report. If possible, include a copy of the storm report if weather was a factor.
- Schedule an Adjuster’s Inspection – Your insurance company will send an adjuster to assess the damage and determine what they’ll cover.
The more organized and thorough you are during this step, the easier it will be to move forward with your claim.
While your claim is now officially in process, there’s a critical step many homeowners miss: getting your own professional inspection before the insurance adjuster arrives. This can give you an expert opinion on the damage and help ensure the adjuster’s assessment is accurate—more on that in the next step.
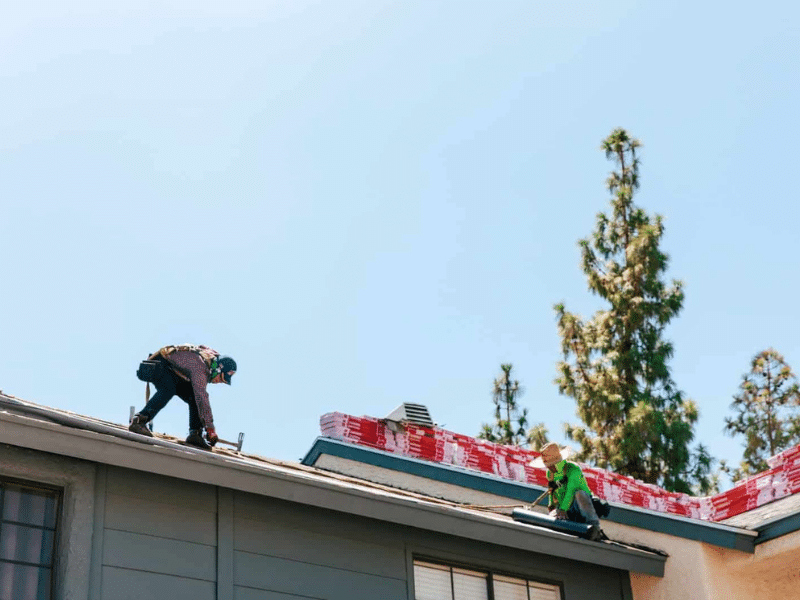
Step 4: Get a Professional Roof Inspection Before the Adjuster Arrives
Insurance adjusters work for the insurance company, not the homeowner. While many do their best to be fair, their job is to limit the company’s payout, which can sometimes lead to underestimated or even denied claims. Having a roofing expert in your corner can help by:
- Identifying hidden damage – Some issues, like underlying structural damage or leaks, aren’t always obvious to adjusters.
- Providing a second opinion – If the adjuster downplays the damage, your contractor’s report can serve as supporting evidence.
- Helping you understand the process – A roofing pro knows what insurance companies look for and can guide you through any challenges.
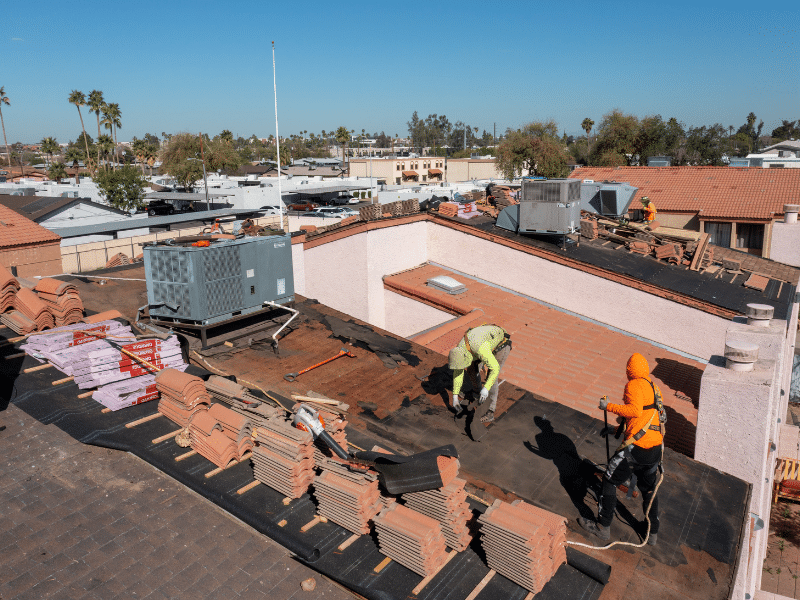
What to Expect from a Professional Roof Inspection
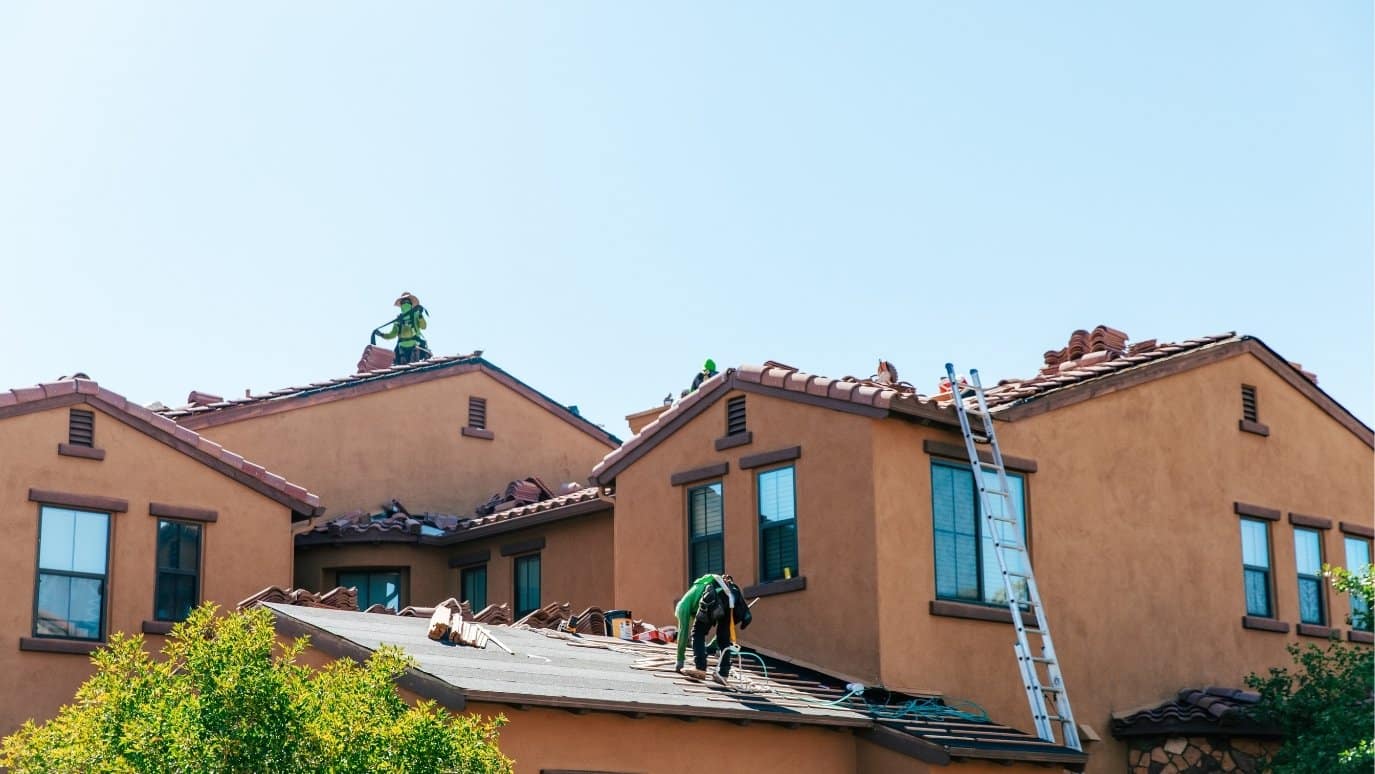
A thorough roof inspection from a reputable Phoenix contractor like RENCO Roofing typically includes:
- Complete exterior roof examination
- Inspection of underlayment and decking where possible
- Assessment of flashing, vents, and roof penetrations
- Inspection of the attic space for signs of leaks or structural issues
- Evaluation of drainage systems and gutters
- Detailed documentation of all findings
- Written report with photos and repair/replacement recommendations
- Estimated costs for necessary work
Once your contractor’s inspection is complete, you’ll be ready to meet with the insurance adjuster. Have all your documentation ready, and if possible, invite your roofing contractor to be present during the adjuster’s visit.
With a professional roofer backing your claim, you’ll have the best chance of getting the coverage you need. Next, we’ll walk through what to expect during the insurance adjuster’s inspection and how to make sure you get a fair assessment.
Step 5: The Insurance Adjuster’s Inspection: What You Need to Know
The insurance adjuster’s visit is one of the most important steps in the claims process. This is when they evaluate your roof’s condition and determine how much—if anything—your insurance company will cover. A thorough, accurate inspection can mean the difference between a fully covered roof replacement and an underpaid or denied claim.
How to Prepare for the Adjuster’s Visit
A little preparation can go a long way in ensuring the adjuster sees the full extent of the damage. Here’s what you can do before they arrive:
- Have your roofing contractor present – An independent professional can point out key damage and provide an expert perspective.
- Gather all documentation – Print out your photos, damage report, contractor’s estimate, and any storm data to support your claim.
- Take notes and ask questions – Don’t be afraid to speak up if the adjuster overlooks something or if you need clarification on their findings.
What If the Adjuster Underestimates or Denies Your Claim?
Unfortunately, not all claims are approved right away. If your adjuster undervalues the damage or denies your claim, you still have options:
- Request a second inspection – If you believe the adjuster missed something, you can ask for a re-evaluation.
- Submit additional evidence – More photos, a detailed report from your roofing contractor, or proof of recent storm damage can help strengthen your case.
- Consult a public adjuster – If negotiations stall, a public adjuster can act on your behalf to challenge the insurance company’s decision.
The goal of this step is to make sure your insurance company has all the facts before finalizing their decision. Once your claim is approved, the next step is understanding how your insurance payout works—and how to make sure you get the full amount you’re entitled to.
Step 6: Getting Your Roof Replacement Insurance Claim Approved & Paid For
The paperwork has been filed, inspections completed, and now you’re waiting for that all-important claim approval. This phase of the process requires attention to detail and understanding how insurance companies determine payments for roof replacements.
Understanding Your Insurance Payout
Insurance companies typically calculate roof replacement payouts in one of two ways:
- Replacement Cost Value (RCV): This more generous option covers the full cost to replace your damaged roof with a similar one at current market prices. However, the insurance company often pays in two installments:
- The first check covers the Actual Cash Value (depreciated value)
- The second check covers the remaining amount after you’ve completed the replacement
- Actual Cash Value (ACV): This less favorable option only pays the depreciated value of your damaged roof, accounting for its age and condition. With ACV coverage, you’ll likely pay a significant portion of the replacement costs out of pocket.
Your policy declarations page specifies which type of coverage you have. Regardless of coverage type, you’ll need to pay your deductible before insurance kicks in.
Negotiating with Your Insurance Company
Even after approval, it’s possible that the initial payout won’t fully cover the cost of a high-quality replacement. If your settlement seems too low:
- Compare it to your contractor’s estimate – If there’s a gap, ask your roofer to help you provide further support to dispute the amount.
- Submit additional documentation – More photos, an updated damage report, or a second opinion from another contractor can strengthen your case.
- Request a supplement – If unforeseen damage is discovered during the replacement process, your contractor can submit a request for additional funds.
Insurance payouts are often issued in multiple steps. The first check is typically sent soon after claim approval, and if your mortgage lender is involved, they may need to sign off before releasing the funds. Once the work is completed, you’ll submit final paperwork to receive the remaining balance.
With your claim approved and your payment in motion, the final step is choosing the right roofing contractor to complete the job—without running into issues that could void your claim.
Step 7: Choosing the Right Roofing Contractor for the Job
With your insurance payout approved, the final step is hiring a trustworthy roofing contractor to complete the work. The right contractor will not only install a high-quality roof but also ensure everything aligns with your insurance company’s requirements—so you don’t run into issues getting your final payment.
What to Look for in a Roofing Company
Not all roofing companies are created equal, and choosing the wrong one could lead to delays, poor workmanship, or even complications with your roof replacement insurance claim. Here’s what to look for:
- Proper licensing and insurance – A legitimate roofing company should be licensed in your state and carry liability insurance.
- Experience with insurance claims – A contractor familiar with insurance processes can help ensure everything is properly documented.
- Strong local reputation – Check online reviews, ask for references, and avoid companies that don’t have an established presence in your area.
Why You Should Avoid Storm Chasers & Unlicensed Contractors
After a major storm, it’s common to see out-of-town roofing companies knocking on doors, offering quick repairs. While their pitch might sound tempting, these “storm chasers” are often unlicensed, uninsured, and more focused on making fast money than providing quality work.
Red flags to watch for:
- High-pressure sales tactics – If a contractor pushes you to sign a contract on the spot, take a step back.
- No local address or reviews – Fly-by-night roofers often disappear after completing low-quality work, leaving homeowners with no recourse.
- Upfront payment demands – While deposits are normal, you shouldn’t have to pay in full before work begins.
A reputable roofing company will be transparent, communicative, and committed to doing the job right.
Now that you know how to choose the right contractor, let’s cover some common mistakes homeowners make when filing a roof replacement insurance claim—and how to avoid them.
Common Mistakes to Avoid When Filing a Roof Insurance Claim
Filing a roof insurance claim can be a complicated process, and small missteps could lead to delays, reduced payouts, or even claim denials. Avoiding these common mistakes will help ensure a smoother experience and improve your chances of getting the coverage you need.
Top Reasons Insurance Claims Get Denied
Insurance companies look for specific details when evaluating claims. Here are some common reasons claims get denied:
- Missing the filing deadline – Most policies have strict time limits for reporting roof damage, so don’t wait too long.
- Lack of proper documentation – Failing to provide clear photos, inspection reports, or proof of storm damage can weaken your claim.
- Accepting a low settlement without questioning it – Insurance companies may offer a lower amount initially, but you have the right to dispute it.
- Hiring an inexperienced or uninsured contractor – If your contractor doesn’t follow proper procedures, it could impact your final insurance payout.
How to Ensure a Smooth Roof Replacement Process
Being proactive and organized can make a big difference in how quickly and successfully your claim is processed. Here’s what to do:
- Keep all communication in writing – Document conversations with your insurance company, adjuster, and contractor in case issues arise.
- Work with a trusted local roofing company – An experienced roofer who understands insurance claims can help advocate for you.
- Follow up regularly with your insurance provider – Stay on top of your claim to avoid unnecessary delays.
Even if you follow all the right steps, there’s always a chance your claim could be denied. Next, we’ll go over what to do if your claim is rejected—and how to fight back if necessary.
What to Do If Your Roof Replacement Insurance Claim Is Denied
Even if you’ve done everything right, there’s always a chance your insurance company might deny your claim or approve a payout that’s lower than expected. While frustrating, a denial isn’t always the final word—you have options to challenge the decision and potentially get the coverage you deserve.
Understanding the Appeals Process
If your claim is denied, the first step is to understand why. Your insurance company should provide a written explanation detailing the reason for the denial. Some common reasons include:
- The damage was deemed normal wear and tear rather than storm-related.
- The insurance adjuster found insufficient evidence of damage.
- The claim was filed after the deadline outlined in your policy.
If you believe the denial is unfair, you can appeal the decision by taking the following steps:
- Review your policy – Double-check what’s covered and ensure the denial aligns with your policy’s terms.
- Gather additional evidence – More photos, a second opinion from a contractor, or weather reports can strengthen your case.
- Request a second inspection – If your adjuster missed something, ask for a re-evaluation with another insurance representative.
When to Seek Legal Assistance
In some cases, insurance companies unfairly deny claims or significantly underpay, even when clear evidence supports coverage. If you’ve exhausted the appeals process and still aren’t getting the payout you deserve, you may need to:
- Consult a public adjuster – These professionals work for you, not the insurance company, and can help negotiate a fair settlement.
- Seek legal advice – If your insurance provider is acting in bad faith—delaying payments, ignoring evidence, or refusing to honor your policy—you may have legal options to challenge their decision.
While no one wants to deal with claim disputes, knowing your rights and advocating for yourself can make all the difference in getting your roof replacement covered.
With your insurance claim handled, the last step is ensuring a smooth, hassle-free roof replacement process. Let’s wrap things up with some final tips and next steps.
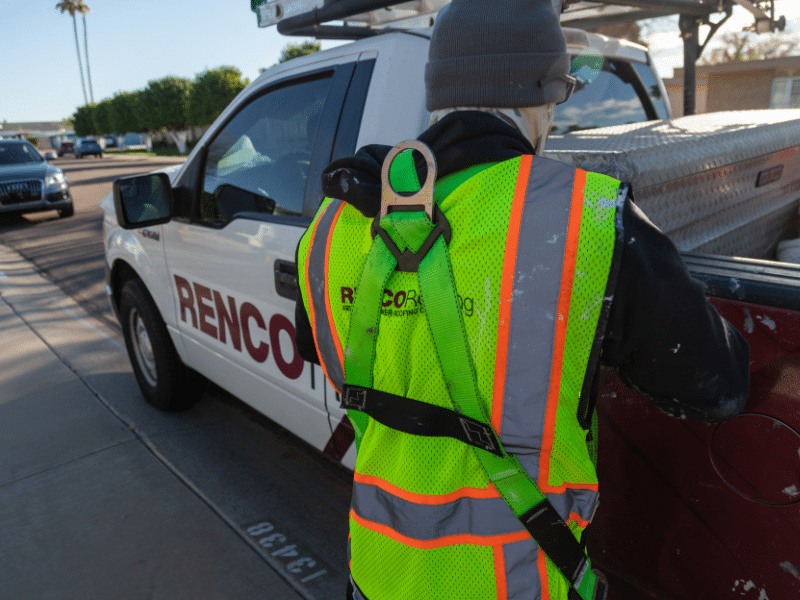
Securing Your Roof Replacement: The RENCO Roofing Difference
At RENCO Roofing, we’ve helped countless Phoenix homeowners through successful insurance claims since 2004. Our experienced team understands Arizona’s unique roofing challenges and the intricacies of the insurance claim process.
We provide roof inspections, detailed documentation, insurance adjuster meeting assistance, and quality roof replacements that stand up to Arizona’s harsh climate. Our family-owned company has built a reputation for integrity, professionalism, and exceptional craftsmanship throughout the Phoenix Valley.
Don’t let a damaged roof compromise your home’s safety or value. Contact RENCO Roofing today for a FREE roof inspection and expert guidance on your insurance claim!